


How To Install a Butterfly Valve
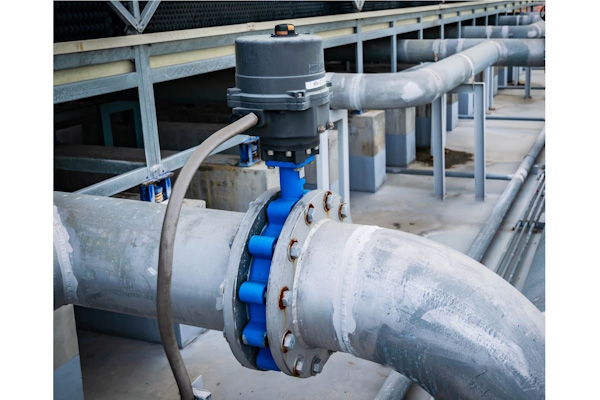
Figure 1: Lug-style butterfly valve installed in a pipeline
Installing wafer and lug-type butterfly valves correctly prevents leakage, misalignment, and damage to the disc or seat. This installation guide provides step-by-step instructions for correctly installing each butterfly valve type. Each section focuses on practical details that ensure proper disc clearance, sealing performance, and the valve's structural integrity within the piping system.
Table of contents
- Pre-installation preparation
- How to install a wafer type butterfly valve on a pipeline
- How to Install a lug-style butterfly valve
View our online selection of butterfly valves!

Pre-installation preparation
-
System safety:
- Before starting installation, depressurize and completely drain the pipeline. Ensure no residual pressure, fluid, or hazardous media remains in the system.
- Lock out and tag the line to prevent accidental pressurization during work.
-
Pipe and valve cleaning:
- Flush the pipeline with air spray or clean water to remove all foreign objects, debris, and residue.
- Clean the flange surfaces to prevent damage to the butterfly valve seat or disc.
- Inspect the valve passage and sealing surfaces, and remove any debris before installing the valve.
-
Valve verification:
- Confirm that the butterfly valve’s pressure, temperature, and material specifications match system requirements.
- If the identification tag is missing, use body markings or purchase records to verify details. Never install the valve without confirmation.
- Check the tag for size, rating, and construction, and ensure flange bolts or studs are the correct grade and length.
-
Handling and orientation:
- Install the valve soon after unpacking and do not loosen factory-set screws or nuts.
- In most cases, butterfly valves can be installed in either direction of flow. If a direction is specified, always follow the manufacturer’s instructions.
- If the valve needs an electric or pneumatic actuator, mount the actuator before installing the valve. Mounting the actuator after installing the valve may cause the valve to be misaligned.
- Butterfly valves can be installed with the stem positioned vertically, horizontally, or at an angle. Any orientation is acceptable for clean fluids. The stem should be horizontal and parallel to the pipe to prevent buildup and extend the service life of the media with suspended solids or scale.
- Keep the disc in a nearly closed position during installation to prevent collision with the pipe flange, unless the manufacturer specifies otherwise.
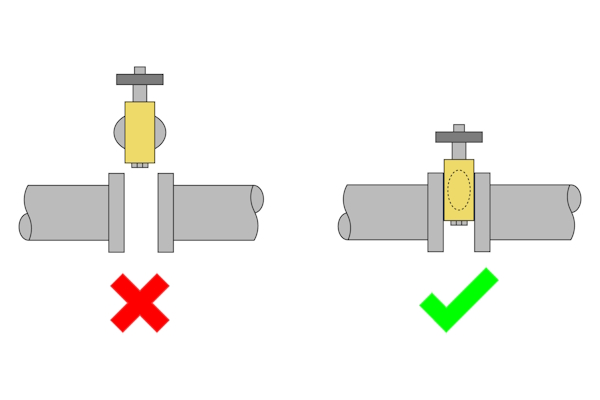
Figure 2: Correct (right) and incorrect (left) disc positioning during initial installation. The disc should be kept nearly closed so the pipe flanges provide enough clearance for the valve body.
-
Pipeline alignment:
- Use tools like a straightedge to verify that the flanges are parallel and evenly spaced; adjust the pipe supports as needed before installation.
- If flanges are not yet welded, follow the alignment procedure in the next section.
-
Expansion and flexibility:
- If the system design involves long pipe runs, significant temperature changes, or vibration, thermal expansion is likely. In such cases, it's crucial to install expansion joints to allow free disc movement and reduce stress on the pipeline system.
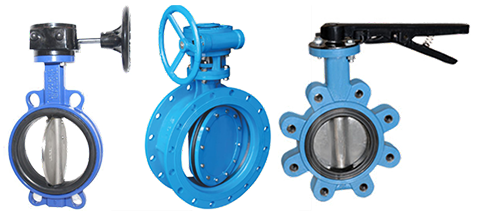
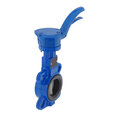
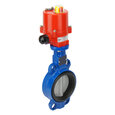
Figure 3: Butterfly valve connection types: wafer type (left) and lug type (right).
Read our butterfly valve overview article for more information on the working and different connection types of butterfly valves.
How to install a wafer type butterfly valve on a pipeline
A wafer butterfly valve is compact and has alignment holes that match the pipeline flanges. It clamps between two flanges using stud bolts. Wafer butterfly valves are ideal for tight spaces or short pipe runs. However, it cannot be used for end-of-line service, as it requires flanges on both sides for proper sealing and support. The installation process varies depending on whether the flanges are pre-welded or still need welding (See next section).
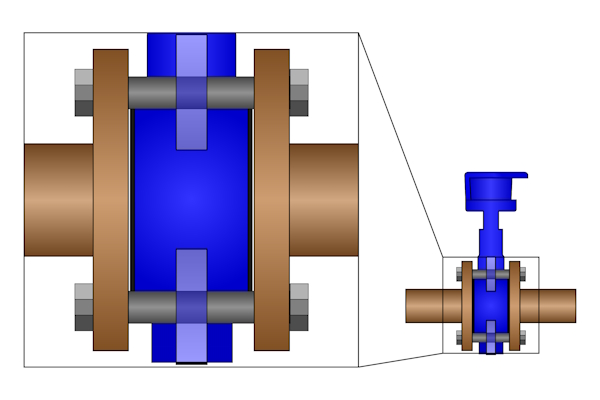
Figure 4: Bolts threaded on both ends pass through the holes on the butterfly valve.
Installation with flanges not yet welded
- Pre-position flanges: Slide the flanges onto the pipe near the installation point, with bolt holes roughly aligned with those of the valve.
- Position the valve temporarily: Place the butterfly valve between the flanges and insert a few bolts and nuts lightly to hold the alignment and maintain spacing. Uneven bolt torque can misalign flanges and the valve; tighten bolts evenly to maintain proper alignment.
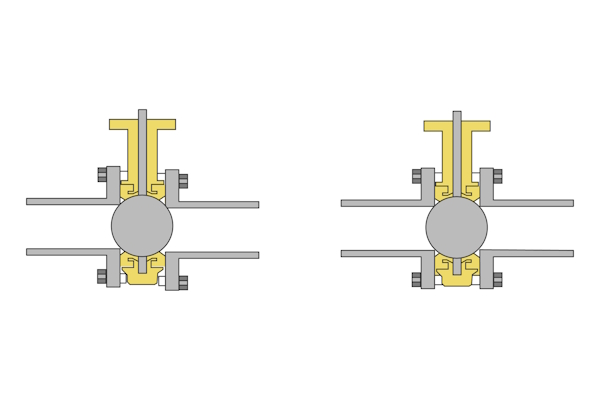
Figure 5: Mis-aligned pipe flanges due to uneven torque applied to bolting (left) and aligned piping (right)
- Spot weld flanges: Apply temporary spot welds to hold the flanges parallel and evenly spaced. This prevents shifting or misalignment during the final welding process.
- Remove the valve: Carefully remove the valve to protect it from welding heat, spatter, and distortion.
- Fully weld the flanges: Complete the flange welds on the pipeline and allow sufficient time for cooling before continuing.
- Install the valve: Reposition the valve between the fully welded flanges, keeping the disc slightly open to avoid contact with the flange.
- Insert and tighten bolts: Insert all bolts and tighten them gradually in a cross pattern, ensuring even compression, proper alignment, and avoiding over-tightening.
- Check valve operation: Open and close the valve fully to confirm smooth movement. Make adjustments as necessary, and then leave the disc slightly open for regular operation.
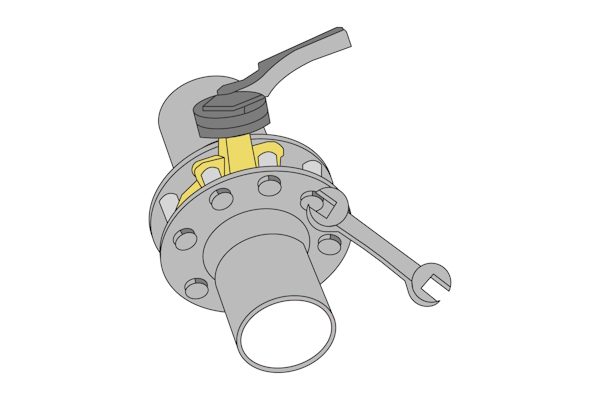
Figure 6: Insert all bolts and tighten them gradually in a cross pattern.
Installation with flanges already welded
- Inspect flange alignment: Ensure the flanges are parallel and correctly spaced for the valve by measuring the distance between flange faces and checking the bolt hole alignment.
- Position the valve: Place the butterfly valve between the flanges with the disc slightly open, typically 10 to 20°, to prevent damage during installation. Align the bolt holes carefully.
- Insert bolts: Insert all bolts and nuts lightly without fully tightening so that minor adjustments can be made to ensure the valve sits evenly.
- Check disc movement: Open and close the valve manually to verify that the disc rotates freely without touching the flange faces.
- Final tightening: Tighten the bolts gradually in a cross pattern to achieve even compression and proper alignment, taking care not to over-tighten and deform the valve or flange.
- Butterfly valve testing: Confirm that the valve opens and closes smoothly and that no binding or interference occurs.
How to Install a lug-style butterfly valve
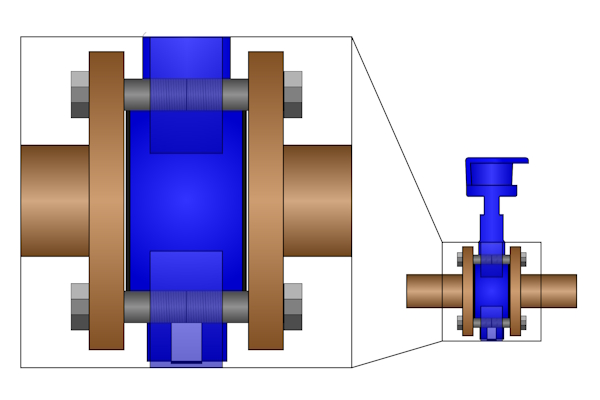
Figure 7: Bolts connect the lug-type butterfly valve to the pipeline on both ends.
A lug-style butterfly valve is installed by bolting each flange independently to the valve’s threaded lugs. Unlike wafer-style valves, lug valves can support the weight of the pipeline through the valve body. They are suitable for use at the end of the pipeline. However, using a blind flange is always recommended for safety.
- Place the valve body between the pipeline flanges. Insert all required bolts through the valve lugs and flange holes. Hand-tighten only at this stage.
- Adjust the valve so it is centered between the flanges. Slowly open and close the disc to make sure it moves freely without obstruction.
- Tighten the flange bolts in a cross-pattern sequence, gradually. This ensures even compression and proper sealing.
- Fully open and close the valve again, checking the actuator or manual stops to confirm correct disc alignment and smooth operation.
- The valve is now ready for use.
FAQs
What is the correct installation direction for a butterfly valve?
Butterfly valves can be installed in any orientation—horizontal, vertical, or tilted—as long as the actuator and disc are properly supported.
Can butterfly valves be installed upside down?
Butterfly valves can generally be installed upside down; however, this orientation may restrict access to the actuator. Always verify the manufacturer’s guidelines regarding actuator support and valve size.
Should the butterfly valve be open or closed during installation?
Keep the disc slightly open to prevent damage to the seat and disc during flange alignment.
Do butterfly valves need gaskets between flanges?
No, most wafer and lug-type butterfly valves seal directly with their molded elastomer seat; gaskets aren’t needed.
What causes leakage after installing a butterfly valve?
Leakage occurs due to misalignment, damaged seat or disc, over-tightened bolts, or improper disc position during installation.


