Air compressor pressure switch adjustment
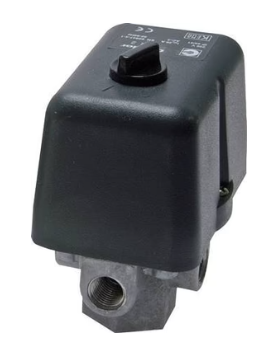
Figure 1: Air compressor pressure switch
In this article, we explain how to correctly adjust your air compressor switch. We start off with some background information about their function, followed by a step-by-step adjustment guide.
Table of contents
- What is the function of the compressor switch?
- Air compressor pressure switch diagram
- Step by step adjustment
- FAQ
What is the function of the compressor switch?
They are used to keep the pressure in a tank between a pre-set lower and upper pressure. When the tank pressure crosses the upper or lower limit, an electrical switch is operated.
Normally Closed (NC) switches break the circuit when the pressure crosses the upper limit. This will switch off the compressor pump. As the pressure drops over time and crosses the lower limit, the switch will make an electrical circuit. This activates the compressor pump until the upper limit is reached.
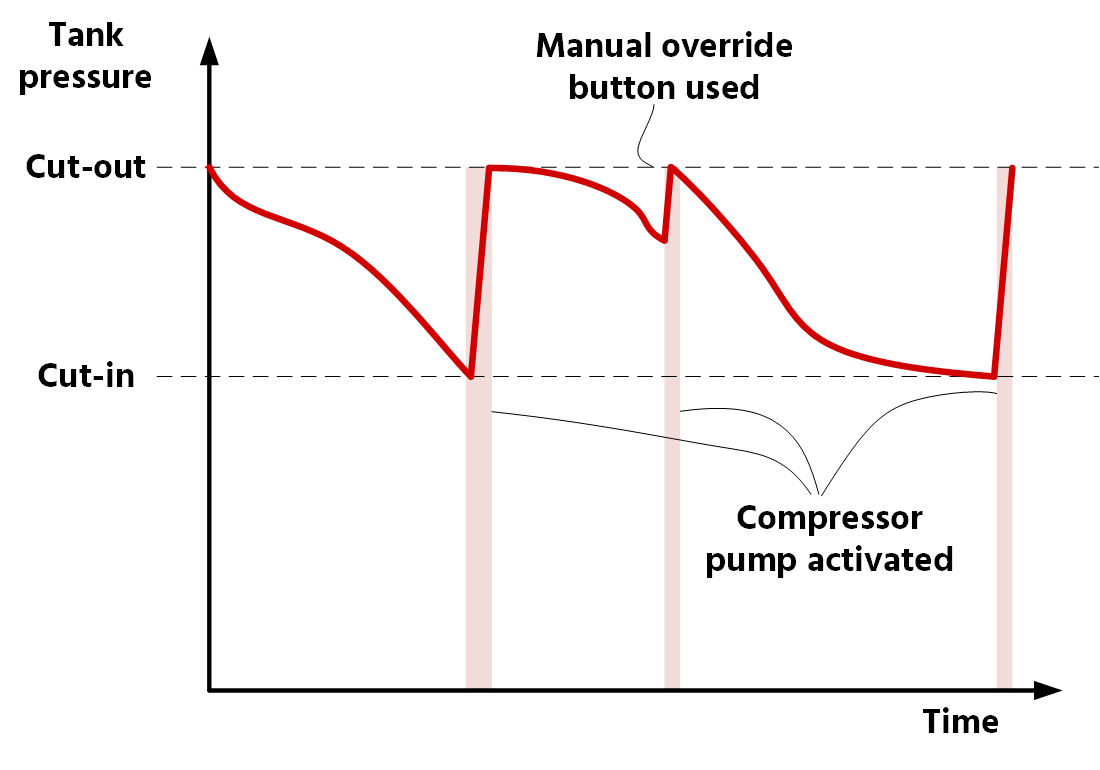
Figure 2: Typical pressure characteristics of a compressor tank
A Normally Open (NO) switch operates the opposite way. It breaks the circuit at the lower limit and closes the circuit at the upper limit. Furthermore, there are changeover contacts that allow the user to choose between NC and NO operation.
The lower and upper limit for compressor switches are referred to as the cut-in and cut-out pressure. The difference between the cut-in and cut-out pressure is called hysteresis.
Most switches allow you to adjust the cut-in and cut-out values proportionally by adjusting the main spring. The hysteresis (difference between the cut-out and cut-in pressure) can often be set by a second smaller adjustment spring. The switch can thus be easily set with 2 set screws.
Air compressor pressure switch diagram
The graph below shows a typical pressure switch diagram. The horizontal axis shows the cut-out pressure and the vertical axis the cut-in pressure. The shaded area shows the range in which the switch can operate.
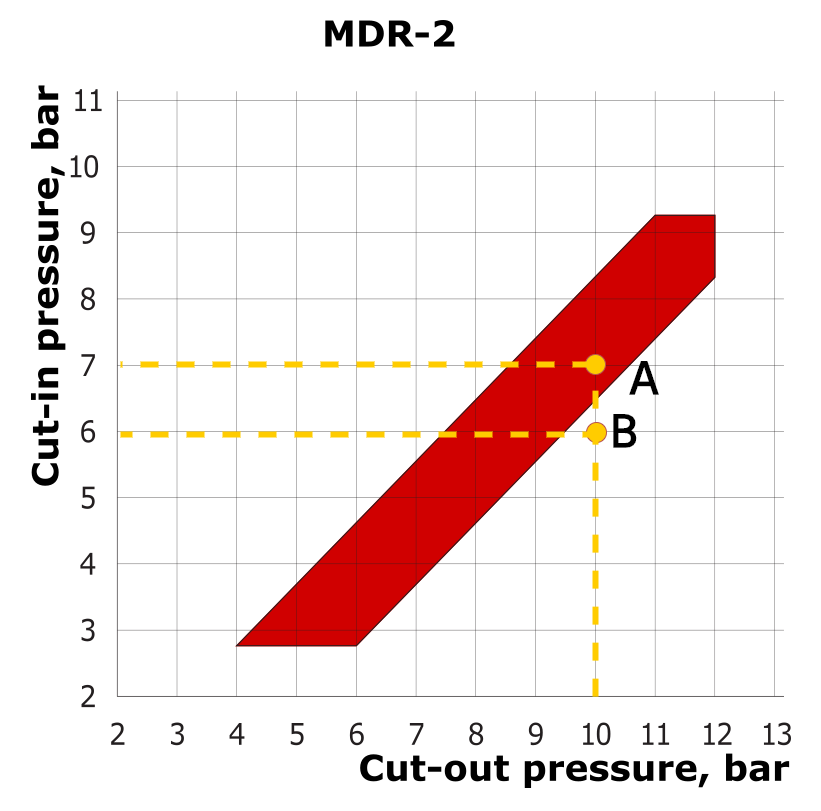
Figure 3: Pressure diagram for a typical compressor switch
To explain how to use it, let’s consider the following two examples:
- Example 1: The user wants to adjust the switch to a cut-out pressure of 10 bars and a cut-in pressure of 7 bars. The hysteresis is 3 bars. The cut-out and cut-in pressures intersect at point A. Point A lies within the shaded area, so this particular switch can be used for the desired settings.
- Example 2: The user wants to adjust to a cut-out pressure of 10 bars and a cut-in pressure of 6 bars (4 bars hysteresis). The intersection at point B lies outside of the shaded area. This setting is not possible with this switch.
Step by step adjustment
Step 1 - Preparation
Before starting work, ensure that the power supply is turned off. Make sure that you have the datasheet of your particular switch on hand. For these instructions the Condor MDR 2 is used as an example. Your switch might have a different adjustment mechanism.
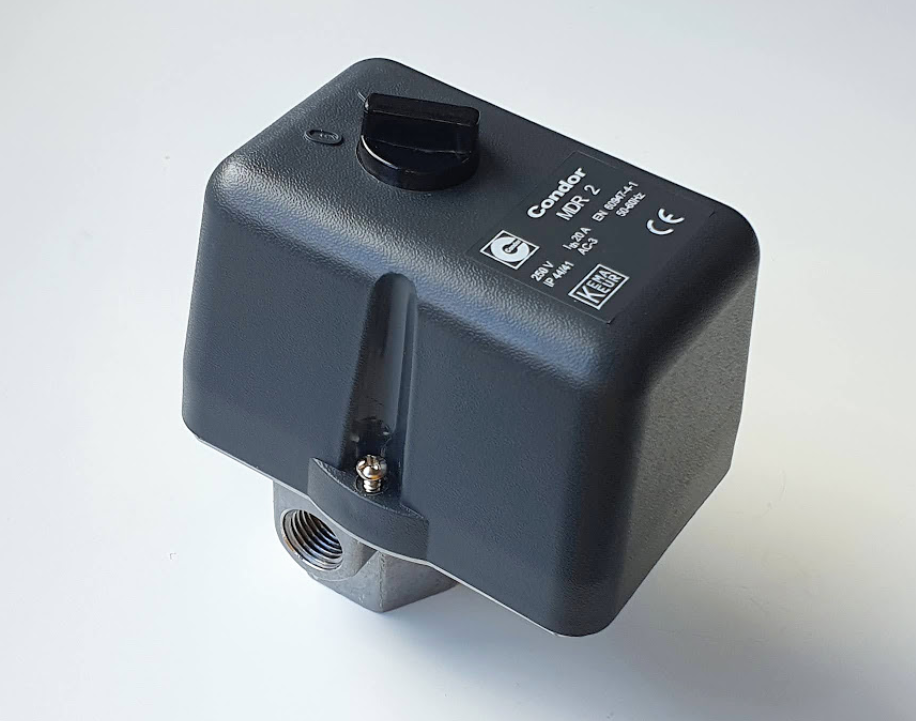
Figure 4: The Condor MDR 2 compressor switch including a manual button
Step 2 - Understanding the adjustment settings
First remove the cap. You will see the connection points for the motor and the power supply. Also, you will see one or two large springs and a smaller spring. By turning the nut on the rod end, the spring pressure can be adjusted.
The small spring (see Figure below) is used to adjust the differential pressure (hysteresis). The large springs are used to adjust the cut-out and cut-in pressure simultaneously and proportionally. For some models like the MDR 2, the small spring adjusts only the cut-out pressure while the cut-in pressure remains the same. For other models it might be the other way around and the adjustment steps are different but the principle remains the same.
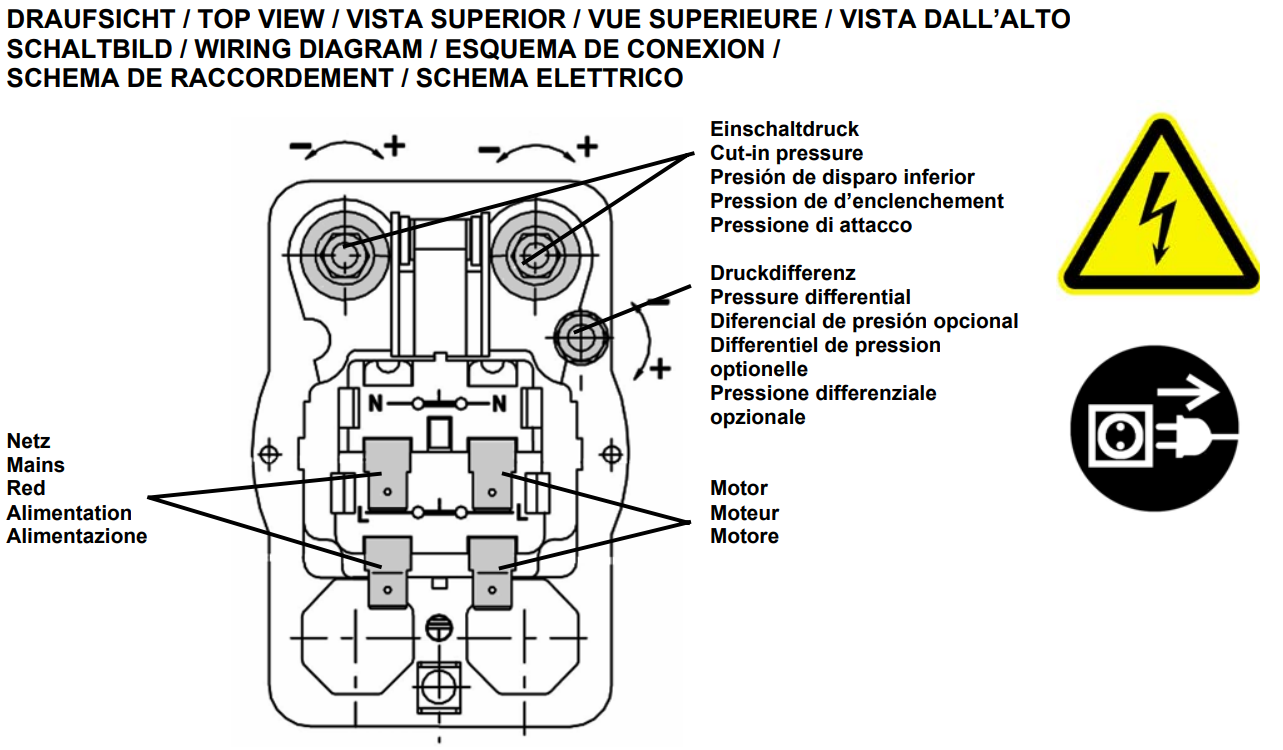
Figure 5: Extracted from the datasheet from a Condor MDR 2 pressure switch
Step 3 - Adjust the hysteresis to maximum
To find the right settings, it is necessary to apply a known pressure to the pressure switch. You can use a calibrated manometer to read the pressure in the system.
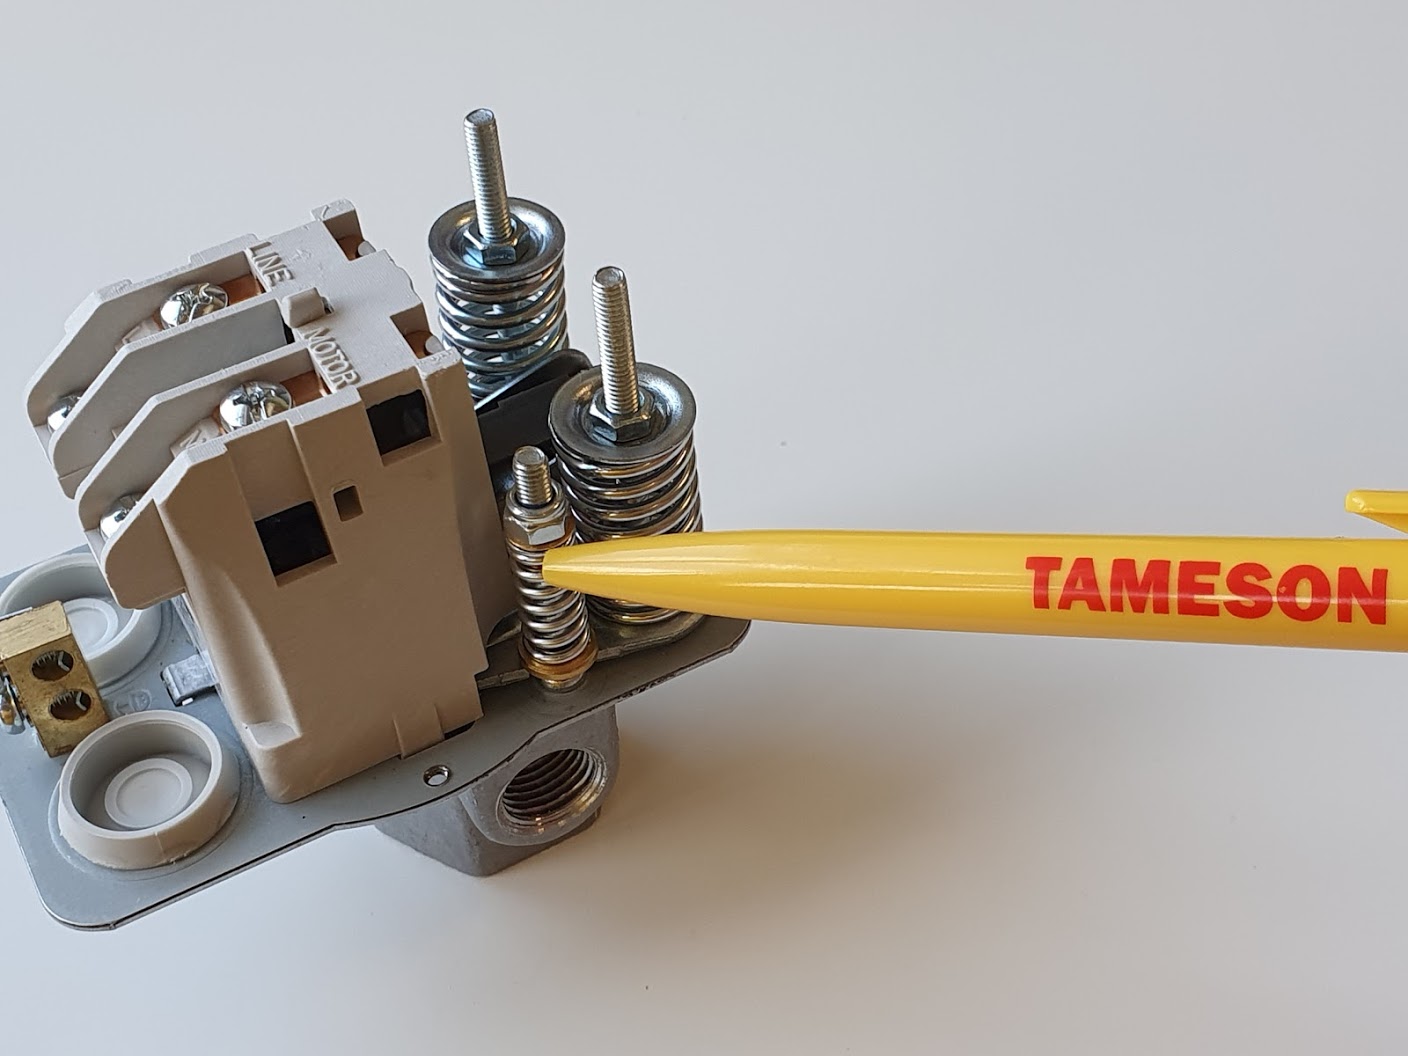
Figure 6: Adjusting the hysteresis with the small set screw
Adjust the hysteresis to the maximum differential pressure. This is done by loosening the nut on the small spring till the spring is not compressed anymore. Remember that turning clockwise means increasing the pressure, and counterclockwise decreasing the pressure.
Step 4 - Adjust the cut-in pressure
Then adjust the large springs to the desired cut-in pressure. Execute carefully and equally on both springs till the switch flips at the right pressure.
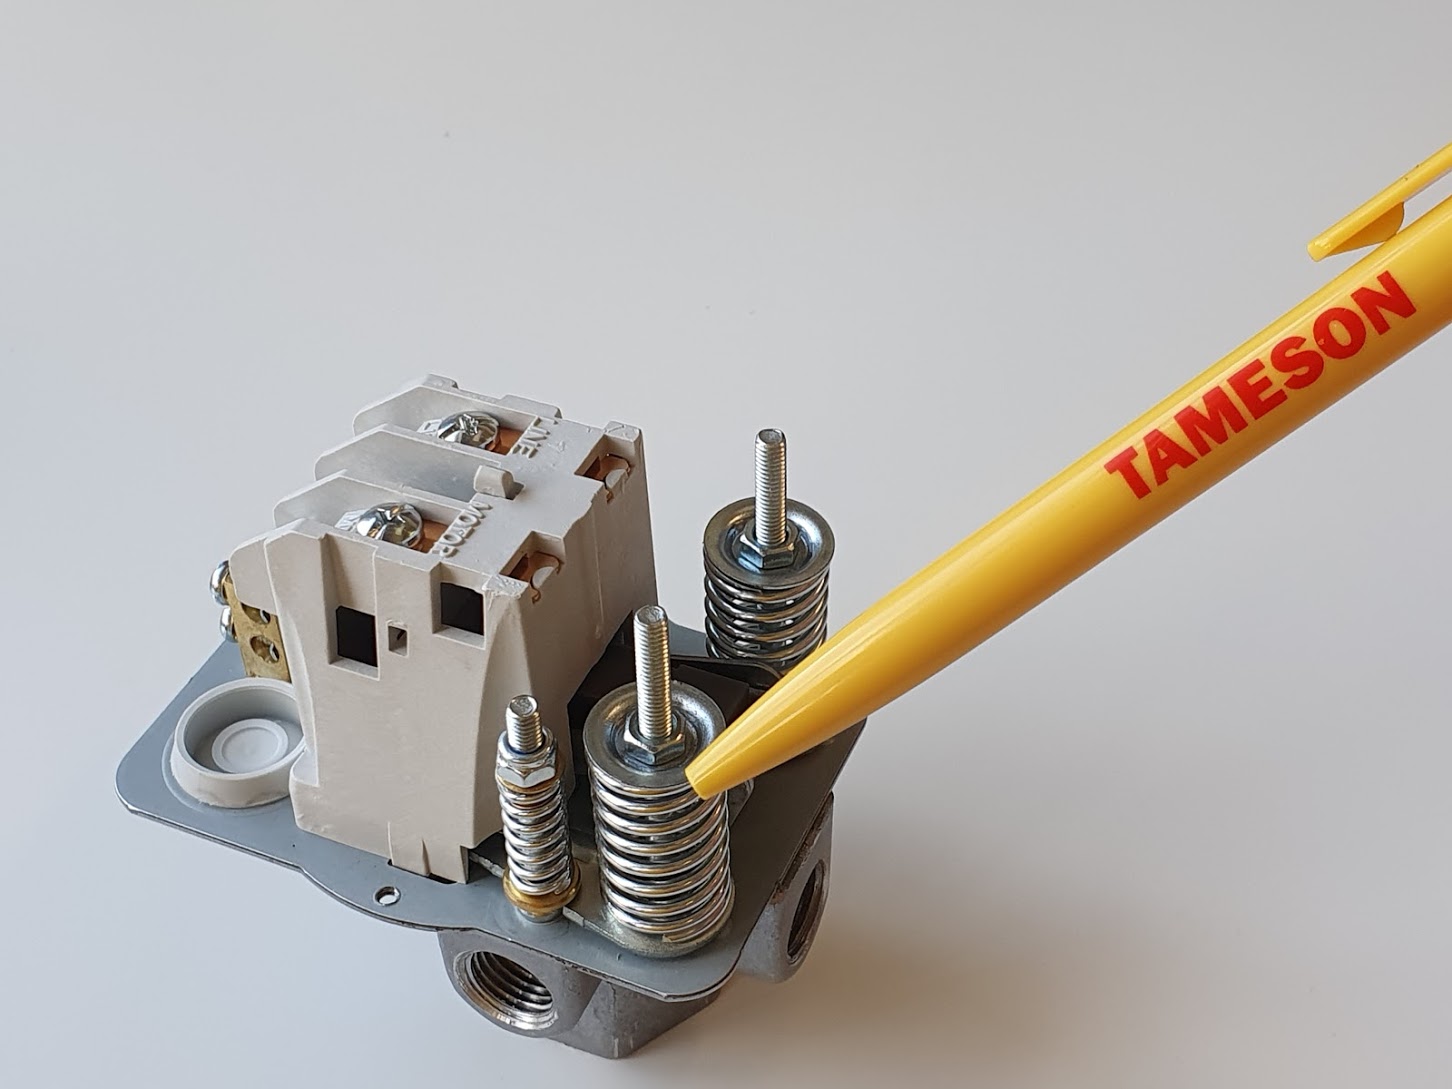
Figure 7: Adjusting the cut-in pressure with the two larger set screws
Step 5 - Adjust the cut-out pressure
As a final step, the cut-out pressure is adjusted by pre-tensioning the small spring until the right value. Once more, please note that sometimes the small spring adjusts the cut-in pressure instead of the cut-out pressure. Furthermore, some switches only have one spring to adjust both cut-in and cut-out pressure simultaneously while the hysteresis is a fixed percentage which cannot be altered.
FAQ
How does the pressure switch work on an air compressor?
The air pressure deflects a membrane inside of the switch. A mechanical spring acts on the other side of the membrane. If the membrane deflects far enough, an electrical switch is operated that switches the compressor pump on or off. By adjusting the pre-tension of the springs, the switch point can be altered.
What pressure should my air compressor be set at?
This depends on your equipment, therefore there is no optimal pressure. However, each extra bar/psi comes at a high energy cost. The goal is to lower the pressure as far as possible without affecting the end users. This also means that the pressure drop from the compressor to the machines must be as low as possible.
How do you check a pressure switch on an air compressor?
You can test the switch using an air source with a calibrated pressure gauge and a multimeter. Before testing, make sure the power supply is cut off. If the switch doesn’t operate properly, it can be replaced. If it operates at the wrong pressure levels, you can adjust the cut-in and cut-out pressures according to the steps above.


