


How To Troubleshoot Ball Valve Leaks
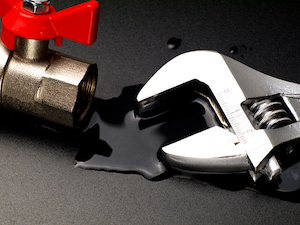
Figure 1: A leaking ball valve can cause water damage, pressure loss, and system inefficiency if not repaired
Understanding the reasons behind ball valve leaks and identifying them is crucial for effective troubleshooting. Ball valve leaks can be internal or external. External leaks occur at the points where the valve connects with other piping system components, such as threaded connections. Internal leaks happen within the valve body itself. This article covers the common symptoms of ball valve leakage, their causes, troubleshooting methods, and maintenance procedures.
Table of contents
- How do you fix a leaking ball valve?
- Symptoms of internal leakage
- Why is my ball valve leaking?
- Repairing vs replacing a ball valve
- Preventing future ball valve leaks
- FAQs
View our online selection of ball valves!
How do you fix a leaking ball valve?
Step 1: Initial visual inspection
Begin by visually inspecting the exterior of the ball valve for any signs of leaks. Look for moisture or drips around the stem, body, or handle. Identifying the source of external leaks is crucial for determining the next steps in troubleshooting.
Step 2: Inspect stem and handle
Examine the stem exit point and test the handle's operation. If you notice leaks around the stem, it may be due to stem packing or seal issues. Tighten the packing nut. If the leak persists, replace the stem packing seals. Ensure the handle moves smoothly, checking for any debris or damage that might obstruct its operation.
Step 3: Examine body and connections
Inspect the body joints and connection points for leaks. Unevenly tightened bolts or improper torque can cause leaks at these joints. Apply even torque to the bolts and retighten connections as needed. For thread leaks, pull the threads carefully, and if necessary, disassemble the connection, apply thread sealant tape (e.g., PTFE tape), and reassemble.
Step 4: Check internal components
Disassemble the valve, ensuring the system is depressurized first. Look for internal issues such as damaged balls or seats, degraded seals and gaskets, or debris buildup. Replace any worn or corroded components and clean out any obstructions using appropriate cleaning agents.
Step 5: Assess environmental factors
Evaluate whether the valve's materials are compatible with the media and environment in which they operate. Incompatible materials can degrade over time, leading to leaks. If necessary, upgrade to materials more resistant to the operating environment.
Step 6: Conduct pressure testing
After reassembling the valve, perform a pressure test to check for persistent leaks. Ensure all components are correctly installed and the valve is tested under pressure to confirm the leak has been resolved. If leaks persist, revisit the previous steps to identify any overlooked issues.
Symptoms of internal leakage
Detecting internal leaks early is crucial to avoid system complications and ensure repairs are made promptly. Here are some common signs that may indicate internal leakage:
- Unexpected pressure drops
- The ball valve leaks when closed
- Fluctuating fluid levels
- Unusual sounds or vibrations
To identify a leaky ball valve, look for stains or pooling around the stem, valve body, or threaded connections. Additionally, use bubble tests to check for leaks.
Why is my ball valve leaking?
Ball valve leaks can arise from several factors. Recognizing these causes is essential for effective troubleshooting and repair.
Component failures
- Seals and seats: Seals and seats ensure a tight seal between the ball and valve body. Over time, seats may degrade and crack from corrosion, leading to slow leaks.
- Ball: Prolonged exposure to corrosive media can damage the ball, preventing it from sealing correctly.
- Stem: Misalignment or damage to the stem can cause leaks at the stem-seal junction, often resulting from improper handling.
Installation errors
- Torque issues: Proper torque is essential when tightening valve connections. Excessive torque can damage threads, while insufficient torque may not seal properly, leading to leaks. Always follow the manufacturer's torque specifications to ensure a watertight seal.
- Three-piece valves: Ensure all body bolts are evenly tightened for three-piece ball valves. Uneven or loose bolts can cause leaks at the joints.
Wear and tear
Regular use can gradually degrade components such as the stem, ball, or seat, compromising the seal and causing leaks.
- Handle leaks: Inspect the area where the stem exits the valve body. If you notice leakage here, the stem packing or seals may be compromised. Tighten the packing nut slightly to see if the leak stops. If not, the packing may need replacement.
- Body leaks: A ball valve leaking from the body may indicate eroded or cracked seats, often due to damage during transit or chemical erosion. If eroded, replacing the seats or the ball can address these leaks.
Debris and sediment buildup
Over time, debris and sediment can accumulate, obstructing flow and damaging internal components like the ball, seat, and seals. This can make it difficult to fully open or close the valve and may cause leaks by disrupting the seal.
Environmental influences
Temperature extremes (high or low), corrosive media, humidity, and UV exposure can all lead to leaks by degrading seals and other internal components. Stainless steel valves generally resist humidity and UV damage.
Repairing vs replacing a ball valve
Deciding whether to repair or replace a ball valve depends on several factors:
- Availability and cost: If replacement parts are hard to find or costly, replacing the entire valve might be more practical.
- Valve condition: Replace the valve if it shows extensive wear or damage.
- Operational downtime: Consider which option- repair or replacement- minimizes downtime.
- Safety and compliance: Ensure the valve meets current safety and compliance standards. If not, replacement is necessary.
- Long-term cost: Repaired valves may require frequent maintenance and have a shorter lifespan.
Preventing future ball valve leaks
- Regular maintenance: Establish a plan to clean and lubricate valves regularly, preventing leaks by addressing issues early.
- Routine inspections: Check for signs of corrosion, wear, or damage, and test valve operation for leaks.
- Proper installation practices: Ensure compatible components are installed with correct torque and alignment.
- Material compatibility: Choose valve and seal materials suited to the fluid, pressure, temperature, and environmental conditions.
FAQs
Can a leaking ball valve be repaired?
Yes, a leaking ball valve can often be repaired by replacing damaged components like seals, seats, or the ball itself, depending on the source of the leak.
How to fix a ball valve leak?
Identify the leak source, then replace faulty seals, seats, or the ball. Tighten connections and apply sealant if needed to ensure a proper seal.
How do you fix a ball valve leaking from screw connections?
To fix a ball valve leaking from screw connections, tighten the screws to the correct torque and replace any worn or damaged seals.
What causes a ball valve to leak when it is open?
A ball valve leaking when open may be due to damaged seals or ball erosion, preventing a proper seal.
How do you fix a water shutoff valve leaking when closed?
Replace worn seals, clean out debris, and inspect the valve seat for damage. Tighten any loose components to ensure a proper seal.
Why is my ball valve leaking from the handle?
A ball valve leaking from the handle is likely due to worn packing around the stem. Tighten the packing nut or replace the packing to stop the leak.


