Preventive Measures For Industrial Valve Maintenance
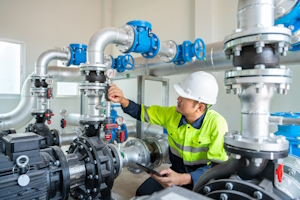
Figure 1: A maintenance staff employee inspects the valves of a water pump system.
Proper maintenance of valves is important for keeping industrial systems working well for a long time. Valves help control the movement of liquids and gasses, so taking care of them is necessary to avoid expensive problems and to keep systems safe. Regular maintenance helps find possible issues before they become big problems and makes valves last longer, which saves money over time. By following a set maintenance plan, companies can improve performance and keep things running smoothly.
Table of contents
- Valve maintenance checklist
- Inspecting
- Cleaning
- Valve installation and alignment
- Lubrication
- Replace seals
- Regular training
Shop our selection of valve maintenance products!
Valve maintenance checklist
The rest of this article provides significant information on preventative maintenance strategies. A control valve maintenance checklist is a valuable tool to make sure all maintenance tasks are done systematically. It helps organize regular inspections and servicing, reducing the chance of missing something important during the control valve maintenance procedure. A general checklist will involve the following items:
-
Visual inspection:
- Check for external damage, corrosion, or leaks.
- Inspect the valve body, actuator, and connections for signs of wear or damage.
-
Operational testing:
- Verify that the valve opens and closes smoothly without sticking or excessive resistance.
- Check the response time of the actuator and ensure it aligns with specifications.
-
Seal and gasket examination:
- Inspect seals and gaskets for wear, cracks, or brittleness.
- Replace any damaged or worn seals to prevent leaks.
-
Lubrication:
- Apply appropriate lubricants to moving parts such as stems and actuators.
- Ensure that lubrication is done according to the manufacturer's recommendations.
- Pressure and flow verification: Use pressure gauges or flow meters to measure and record pressure and flow rates to ensure they are within acceptable ranges.
-
Calibration check:
- Verify the calibration of control systems and sensors.
- Adjust settings as necessary to maintain accurate control of flow and pressure.
-
Documentation:
- Record all maintenance activities, findings, and corrective actions taken.
- Maintain a log for future reference and compliance purposes.
Inspecting
Before cleaning a valve, inspect it thoroughly to find any hidden problems.
- Start by looking at the outside for damage, like cracks or rust, which might mean leaks or weaknesses.
- Listen for strange noises or vibrations during use, as these may indicate internal issues.
- Check that the valve is aligned with the piping system to avoid uneven stress, which can cause breakdowns.
- If the valve is disassembled, inspect the inside parts—such as the valve seat, stem, and seals—for wear, rust, or build-up that could block fluid flow.
- Pay close attention to seals and gaskets for any cracks or deformation.
- Note any issues and replace damaged parts using the right components.
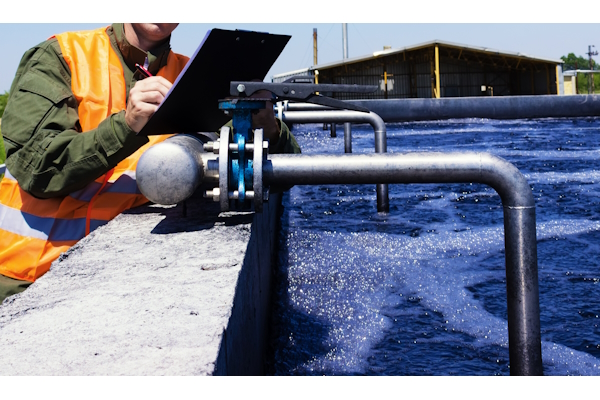
Figure 2: An employee visually inspects a valve in a water filter system.
Cleaning
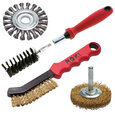
Regular cleaning helps prevent the buildup of dust, grime, and mineral deposits, which can impede valve function. For the exterior, a simple scrub with a rag or wire brush can remove surface contaminants. This is also an opportunity to check for signs of leaks, such as corrosion or rust, which may indicate internal issues.
For internal cleaning, begin by carefully disassembling the valve using a wrench set and screwdrivers to access and remove any buildup that could obstruct flow. Use a wire brush and pipe cleaners to clean each component thoroughly. Inspect all moving parts for damage and ensure they move freely. Replace any worn, brittle, or broken parts to maintain the valve's smooth and efficient operation. Reassemble the valve, ensuring all components are securely in place.
Cleaning solutions
A mild soap and water solution is often sufficient for general cleaning to remove dust and grime from surfaces. This combination is gentle and effective for most materials without causing damage. Consider using a specialized cleaning solution for mineral deposits or more stubborn grime. Vinegar or a commercial descaling agent can be effective for dissolving mineral deposits, especially in areas with hard water. However, it's important to ensure that any cleaning solution is compatible with the valve material to avoid corrosion or damage. Learn more in our chemical resistance of materials article.
When cleaning internal components, avoiding harsh chemicals that could degrade seals or other sensitive parts is crucial. Always rinse thoroughly with water after using any cleaning solution to ensure no residue remains. If in doubt, consult the valve manufacturer's guidelines for recommended cleaning products and procedures.
Valve installation and alignment
Ensuring proper valve alignment and installation is crucial for maintaining optimal performance and preventing premature wear. The following steps are primarily for the installation process, but steps 1 and steps 7-9 are also suitable for a previously installed valve.
- Gather necessary documentation: Obtain the manufacturer's installation and alignment guidelines specific to the valve model.
- Inspect the piping system: Before installing the valve, inspect the piping system for proper support and alignment. Address any misalignment issues in the piping to prevent stress on the valve.
- Position the valve: Orient the valve according to the manufacturer's specifications. Ensure that any flow direction indicators are correctly aligned with the system's flow direction.
- Align the valve with the piping: Use alignment tools or visual guides to ensure the valve is centered and properly aligned with the piping system. This helps prevent uneven stress distribution.
- Secure the valve connections: Connect the valve to the piping system, ensuring all connections are tight and secure. Use appropriate gaskets or seals to prevent leaks.
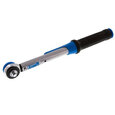
- Tighten hardware to specifications: Use a calibrated torque wrench to tighten all bolts, nuts, and other hardware to the manufacturer's recommended torque settings. This prevents loosening during operation.
- Conduct a visual inspection: Perform a thorough visual inspection to verify that the valve is properly aligned and installed. Look for any visible gaps, misalignment, or loose components.
- Perform an operational test: Operate the valve to ensure it opens and closes smoothly without resistance or binding. This confirms proper alignment and installation.
- Check for leaks: After installation, inspect the valve and connections for any leaks. Address any leaks immediately to prevent future issues.
- Schedule routine inspections: Incorporate regular inspections into the maintenance schedule to verify that the valve remains aligned and securely installed over time.
Lubrication
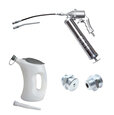
Regular lubrication ensures smooth operation and reduces wear on moving parts. Lubrication minimizes friction, which can otherwise lead to increased wear and potential failure. It is important to use the correct type of lubricant as specified by the valve manufacturer to avoid any adverse reactions with valve materials or the fluids being controlled. Put lubricant on important areas like valve stems, seals, and other moving parts. This helps the valve work well and last longer. Create a lubrication schedule based on how the valve is used and its environment to make sure it is applied regularly.
Replace seals
When seals and gaskets show signs of wear, such as cracks, brittleness, or deformation, replace them promptly to maintain the valve's performance and safety. Use the correct replacement parts as recommended by the manufacturer.
First, read our article on how to prevent o-ring damage to minimize situations like this. Then, before replacing an o-ring, read our guide on installing, replacing, and measuring o-rings.
Regular training
Maintenance staff should undergo regular training courses. This training is important so staff have the latest knowledge and skills for valve maintenance. Well-trained staff can find problems early, use the right maintenance methods, and help keep operations safe and efficient. Regular training courses provide:
- Skill enhancement: Training programs help maintenance staff improve their skills, so they can do tasks well and accurately.
- Technological advancements: As valve technology changes, training helps staff learn about new equipment, tools, and software to manage modern systems effectively.
- Safety protocols: Regular safety updates prevent accidents and ensure compliance with industry standards.
- Problem-solving abilities: Training improves staff's ability to solve problems quickly, reducing downtime and interruptions.
- Standardization: Consistent training ensures all team members follow the same procedures, leading to uniform maintenance practices and better reliability.
FAQs
What is included in a valve maintenance checklist?
A valve maintenance checklist includes inspection, cleaning, lubrication, testing, and documentation of valve conditions and repairs.
Why is control valve maintenance important?
Control valve maintenance is important to prevent failures, ensure accurate flow control, and extend the lifespan of the valve, reducing downtime and costs.


