Tap Drill Size Charts
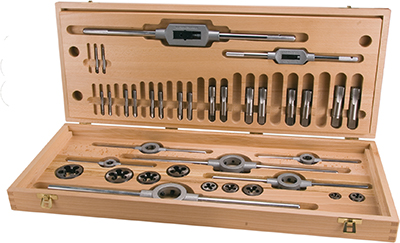
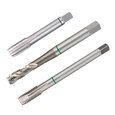
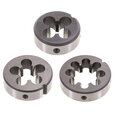
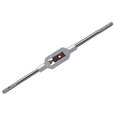
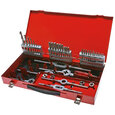
Figure 1: Tap and die set
When cutting threads, you must understand the specific requirements to ensure precision.
First, determine whether you need unified or metric threads, as this affects the tools and measurements used. Unified threads are common in North America, while metric threads are standard globally.
Knowing the major diameter, the largest diameter of the thread, ensures a proper fit.
Finally, the pitch, or the distance between adjacent threads, influences the thread's tightness and strength, making it essential for achieving the desired performance.
Table of contents
- Tap drill size chart
- Pipe thread drilled hole sizes
- Unified tap drill size chart (inch)
- Metric tap and drill chart
View Tameson's selection of thread cutting tools
Tap drill size chart
For a more in-depth understanding on threads, please read our thread design and thread standards articles.
The chart in Table 1 is used for tapping female threads into a component.
- Identify the screw designation, which correlates with the tap size on the chart.
- Use the corresponding drill size to drill the hole.
Table 1: Tap drill size chart to tap female threads into a component
| TAP SIZE | DRILL SIZE | ||
| INCH | METRIC | DRILL SIZE | DECIMAL EQUIVALENT |
| 0-80 | 3/64 | .0469 | |
| M1.6 X 0.35 | 1.25mm | .0492 | |
| M1.8 X 0.35 | 1.45mm | .0571 | |
| 1-64 | 53 | .0595 | |
| 1-72 | 53 | .0595 | |
| M2 X 0.40 | 1.60mm | .0630 | |
| 2-56 | 50 | .0700 | |
| 2-64 | 50 | .0700 | |
| M2.2 X 0.45 | 1.75mm | .0689 | |
| M2.5 X 0.45 | 2.05mm | .0807 | |
| 3-48 | 47 | .0785 | |
| 3-56 | 46 | .0810 | |
| 4-40 | 43 | .0890 | |
| 4-48 | 42 | .0935 | |
| M3 X 0.50 | 2.50mm | .0984 | |
| 5-40 | 38 | .1015 | |
| 5-44 | 37 | .1040 | |
| M3.5 X 0.60 | 2.90mm | .1142 | |
| 6-32 | 36 | .1065 | |
| 6-40 | 33 | .1130 | |
| M4 X 0.70 | 3.30mm | .1299 | |
| 8-32 | 29 | .1360 | |
| 8-36 | 29 | .1360 | |
| M4.5 X 0.75 | 3.70mm | .1476 | |
| 10-24 | 26 | .1470 | |
| 10-32 | 21 | .1590 | |
| M5 X 0.80 | 4.20mm | .1654 | |
| 12-24 | 16 | .1770 | |
| 12-28 | 15 | .1800 | |
| M6 X 1.00 | 5.00mm | .1969 | |
| 1/4-20 | 7 | .2010 | |
| 1/4-28 | 3 | .2130 | |
| M7 X 1.00 | 6.00mm | .2362 | |
| 5/16-18 | F | .2570 | |
| M8 X 1.25 | 6.70mm | .2638 | |
| 5/16-24 | I | .2720 | |
| M8 X 1.0 | 7.00mm | .2756 | |
| 3/8-16 | 5/16 | .3125 | |
| 3/8-24 | Q | .3320 | |
| M10 X 1.50 | 8.50mm | .3346 | |
| M10 X 1.25 | 8.70mm | .3425 | |
| 7/16-14 | U | .3680 | |
| 7/16-20 | 25/64 | .3906 | |
| M12 X 1.75 | 10.20mm | .4016 | |
| 1/2-13 | 27/64 | .4219 | |
| M12 X 1.25 | 10.80mm | .4252 | |
| M14 X 2.00 | 12.00mm | .4224 | |
| 1/2-20 | 29/64 | .4531 | |
| 9/16-12 | 31/64 | .4844 | |
| 9/16-18 | 33/64 | .5156 | |
| 5/8-11 | 17/32 | .5312 | |
| 5/8-18 | 37/64 | .5781 | |
| M16 X 2.00 | 14.00mm | .5512 | |
| M16 X 1.50 | 14.50mm | .5906 | |
| M18 X 2.50 | 15.50mm | .6102 | |
| M18 X 1.50 | 16.50mm | .6496 | |
| 3/4-10 | 21/32 | .6562 | |
| 3/4-16 | 11/16 | .6875 | |
| M20 X 2.50 | 17.50mm | .6890 | |
| 45/64 | .7031 | ||
| 23/32 | .7188 | ||
| M20 X 1.50 | 18.50mm | .7283 | |
| M22 X 2.50 | 19.50mm | .7677 | |
| M22 X 1.50 | 20.50mm | .8071 | |
| 7/8-9 | 49/64 | .7656 | |
| 7/8-14 | 13/16 | .8125 | |
| M24 X 3.00 | 21.00mm | .8268 | |
| M24 X 2.00 | 22.00mm | .8661 | |
| 1-8 | 7/8 | .8750 | |
| 1-12 | 59/64 | .9219 | |
| M27 X 3.00 | 24.00mm | .9449 | |
| M27 X 2.00 | 25.00mm | .9843 | |
| 1-1/8-7 | 63/64 | .9844 | |
| M30 X 3.50 | 26.50mm | 1.0433 | |
| 1-1/8-12 | 1-3/64 | 1.0469 | |
| M30 X 2.00 | 28.00mm | 1.1024 | |
| 1-1/4-7 | 1-7/64 | 1.1094 | |
| M33 X 3.50 | 29.50mm | 1.1614 | |
| 1-1/4-12 | 1-11/64 | 1.1719 | |
| 1-3/8-6 | 1-7/32 | 1.2188 | |
| M33 X 2.00 | 31.00mm | 1.2205 | |
| 1-3/8-12 | 1-19/64 | 1.2969 | |
| M36 X 4.00 | 32.00mm | 1.2598 | |
| M36 X 3.00 | 33.00mm | 1.2992 | |
| 1-1/2-6 | 1-11/32 | 1.3438 | |
| M39 X 4.00 | 35.00mm | 1.3780 | |
| 1-1/2-12 | 1-27/64 | 1.4219 | |
| M39 X 3.00 | 36.00mm | 1.4173 | |
Pipe thread drilled hole sizes
The chart in Table 2 describes how to determine the size of unified male threads when making a bolt or threaded pipe.
- Use the thread nominal size column to identify the desired thread designation.
- Based on the desired nominal size, look at the desired standard column to determine the minimum outside diameter of the component for the threads.
Table 2: Chart to determine the size of unified male threads when making a bolt or threaded pipe
| Thread standard/type | ||||||||
| Thread Nominal Size | NPT | NPTF | NPSC | NPSM | NPSF | NPSI | BSPT | BSPP |
| 1/16 - 27 | D (0.246) | D (0.246) | .250 | .250 | .250 | |||
| 1/8 - 27 | Q (0.332) | Q (0.332) | .3437 | .3593 | .3437 | .3437 | ||
| 1/8 - 28 | .3281 | .3437 | ||||||
| 1/4 - 18 | .4375 | .4375 | .4375 | .4687 | .4375 | .4375 | ||
| 1/4 - 19 | .4375 | .4531 | ||||||
| 3/8 - 18 | .5625 | .5781 | .5781 | .6093 | .5781 | .5781 | ||
| 3/8 - 19 | .5781 | .5937 | ||||||
| 1/2 - 14 | .7031 | .7031 | .7187 | .750 | .7187 | .7187 | .7187 | .7343 |
| 5/8 - 14 | .8125 | |||||||
| 3/4 - 14 | .9062 | .9218 | .9218 | .9646 | .9380 | .9650 | ||
| 7/8 - 14 | 1.1093 | |||||||
| 1 - 11 | 1.1718 | 1.1875 | ||||||
| 1 - 11-1/2 | 1.1406 | 1.1562 | 1.1562 | 1.2031 | ||||
| 1-1/4 - 11 | 1.500 | 1.5468 | ||||||
| 1-1/4 - 11-1/2 | 1.4843 | 1.500 | 1.500 | 1.5468 | ||||
| 1-1/2 - 11 | 1.750 | 1.7656 | ||||||
| 1-1/2 - 11-1/2 | 1.7343 | 1.7343 | 1.750 | 1.7913 | ||||
| 1-3/4 - 11 | 2.000 | |||||||
| 2 - 11 | 2.2187 | 2.250 | ||||||
| 2 - 11-1/2 | 2.2031 | 2.2187 | 2.2187 | 2.2638 | ||||
Unified tap drill size chart (inch)
The chart in Table 3 is for unified gauge threads (inch).
- Look up the TPI and desired thread percentage to determine the corresponding outer diameter.
- TPI means threads-per-inch.
- Thread percentage is the percentage of a bolt's shank that has threads.
- The recommended thread percentage is 65%, 70%, and 75%.
- Use the two formulas below to calculate the necessary drilled hole size in inches. For either formula, when inputting thread percentage, use, for example, 65% instead of 0.65.
- In the second method, double thread depth means twice the depth of the thread. For example, if the thread depth is .5 millimeters, the double thread depth is 1.0 millimeter.
Method 1 (inch)
Method 2 (inch)
Unified (inch) calculation example
Find the drilled hole size for a 50% thread in a 1/4 inch - 20 TPI tapped hole.
- Look in the chart's first column for 20 TPI.
- Match this row with the column for 50% thread percentage.
- This results in 0.0325.
- Subtract the result from the outer diameter (0.250).
- The required diameter of the drilled hole is 0.250 - 0.0325 = 0.2175 inches.
Table 3: Tap drill size chart for unified gauge threads (inch)
| Threads per inch | Double thread depth | 50% THREAD | 55% THREAD | 60% THREAD | 65% THREAD (RECOMMENDED) | 70% THREAD (RECOMMENDED) | 75% THREAD (RECOMMENDED) | 80% THREAD | 85% THREAD |
6 |
.21651 |
.1083 |
.1192 |
.1300 |
.1408 |
.1517 |
.1625 |
.1733 |
.1842 |
7 |
.18558 |
.0929 |
.1021 |
.1114 |
.1207 |
.1300 |
.1393 |
.1486 |
.1579 |
8 |
.16238 |
.0813 |
.0894 |
.0975 |
.1056 |
.1138 |
.1219 |
.1300 |
.1381 |
9 |
.14434 |
.0722 |
.0794 |
.0866 |
.0939 |
.1011 |
.1083 |
.1156 |
.1228 |
10 |
.12990 |
.0649 |
.0714 |
.0779 |
.0844 |
.0909 |
.0974 |
.1039 |
.1105 |
11 |
.11809 |
.0590 |
.0649 |
.0708 |
.0767 |
.0826 |
.0885 |
.0944 |
.1005 |
12 |
.10825 |
.0541 |
.0595 |
.0649 |
.0702 |
.0755 |
.0808 |
.0861 |
.0921 |
13 |
.09992 |
.0499 |
.0549 |
.0599 |
.0649 |
.0699 |
.0749 |
.0799 |
.0850 |
14 |
.09278 |
.0464 |
.0510 |
.0556 |
.0602 |
.0648 |
.0694 |
.0740 |
.0789 |
16 |
.08119 |
.0406 |
.0446 |
.0486 |
.0526 |
.0566 |
.0606 |
.0646 |
.0691 |
18 |
.07217 |
.0361 |
.0396 |
.0431 |
.0466 |
.0501 |
.0536 |
.0571 |
.0614 |
20 |
.06495 |
.0325 |
.0357 |
.0389 |
.0421 |
.0453 |
.0485 |
.0517 |
.0553 |
24 |
.05412 |
.0270 |
.0298 |
.0326 |
.0354 |
.0382 |
.0410 |
.0438 |
.0460 |
27 |
.04811 |
.0240 |
.0264 |
.0288 |
.0312 |
.0336 |
.0360 |
.0384 |
.0409 |
28 |
.04639 |
.0232 |
.0254 |
.0276 |
.0298 |
.0324 |
.0347 |
.0370 |
.0395 |
30 |
.04330 |
.0216 |
.0238 |
.0260 |
.0282 |
.0304 |
.0326 |
.0348 |
.0368 |
32 |
.04059 |
.0203 |
.0223 |
.0243 |
.0263 |
.0283 |
.0303 |
.0323 |
.0345 |
36 |
.03608 |
.0180 |
.0198 |
.0216 |
.0234 |
.0252 |
.0270 |
.0288 |
.0307 |
40 |
.03247 |
.0162 |
.0178 |
.0194 |
.0210 |
.0226 |
.0242 |
.0258 |
.0276 |
44 |
.02952 |
.0147 |
.0162 |
.0177 |
.0192 |
.0207 |
.0222 |
.0237 |
.0251 |
48 |
.02706 |
.0135 |
.0148 |
.0161 |
.0174 |
.0187 |
.0200 |
.0213 |
.0230 |
56 |
.02319 |
.0116 |
.0127 |
.0138 |
.0149 |
.0160 |
.0171 |
.0182 |
.0197 |
64 |
.02029 |
.0101 |
.0111 |
.0121 |
.0131 |
.0141 |
.0151 |
.0161 |
.0173 |
72 |
.01804 |
.0090 |
.0099 |
.0107 |
.0115 |
.0123 |
.0131 |
.0139 |
.0153 |
80 |
.01623 |
.0081 |
.0089 |
.0097 |
.0105 |
.0113 |
.0121 |
.0129 |
.0138 |
Metric tap and drill chart
Table 4 shows the tap and drill chart for Metric threads.
- Look up the desired pitch and thread percentage to find the corresponding outer diameter.
- Similar to the unified tap and drill section (see above), use the two formulas below to calculate the necessary size of the drilled hole.
- For metric threads, the recommended thread percentages are 65% and 70%.
Method 1
Method 2
Metric calculation example
Find the drilled hole size for a 65% thread on a 4 mm x 1.00 (M4) tapped hole:
- Look for the 1.00 mm pitch in the chart's first column.
- Match this row to the 65% thread percentage column.
- The result is 0.8444.
- Subtract the result from the thread diameter (4.0 mm)
- The result is 4.0 mm - 0.8444 mm = 3.1666 mm, which is the necessary diameter for the drilled hole.
Table 4: Tap and drill chart for Metric threads
| mm Pitch | Double thread depth | 50% THREAD | 55% THREAD | 60% THREAD | 65% THREAD (RECOMMENDED) | 70% THREAD (RECOMMENDED) | 75% THREAD | 80% THREAD | 85% THREAD |
4.0 |
5.1963 |
2.5982 |
2.8580 |
3.1178 |
3.3776 |
3.6374 |
3.8972 |
4.1570 |
4.4169 |
3.50 |
4.5466 |
2.2733 |
2.5006 |
2.7280 |
2.9553 |
3.1826 |
3.4100 |
3.6373 |
3.8646 |
3.00 |
3.8969 |
1.9485 |
2.1433 |
2.3381 |
2.5330 |
2.7278 |
2.9227 |
3.1175 |
3.3124 |
2.50 |
3.2476 |
1.6238 |
1.7862 |
1.9486 |
2.1109 |
2.2733 |
2.4357 |
2.5981 |
2.7605 |
2.00 |
2.5979 |
1.2990 |
1.4288 |
1.5587 |
1.6886 |
1.8185 |
1.9484 |
2.0783 |
2.2082 |
1.75 |
2.2733 |
1.1367 |
1.2503 |
1.3640 |
1.4776 |
1.5913 |
1.7050 |
1.8186 |
1.9323 |
1.50 |
1.9487 |
.9744 |
1.0718 |
1.1692 |
1.2667 |
1.3641 |
1.4615 |
1.5590 |
1.6564 |
1.25 |
1.6236 |
.8118 |
.8930 |
.9742 |
1.0553 |
1.1365 |
1.2177 |
1.2989 |
1.3801 |
1.00 |
1.2990 |
.6495 |
.7145 |
.7794 |
.8444 |
.9093 |
.9743 |
1.0392 |
1.1042 |
.90 |
1.1687 |
.5844 |
.6428 |
.7012 |
.7597 |
.8181 |
.8765 |
.9350 |
.9934 |
.80 |
1.0394 |
.5197 |
.5717 |
.6236 |
.6756 |
.7276 |
.7796 |
.8315 |
.8835 |
.75 |
.9743 |
.4871 |
.5359 |
.5846 |
.6333 |
.6820 |
.7307 |
.7794 |
.8282 |
.70 |
.9093 |
.4547 |
.5001 |
.5456 |
.5910 |
.6365 |
.6820 |
.7274 |
.7729 |
.60 |
.7793 |
.3897 |
.4286 |
.4676 |
.5065 |
.5455 |
.5845 |
.6234 |
.6624 |
.50 |
.6421 |
.3211 |
.3532 |
.3853 |
.4174 |
.4495 |
.4816 |
.2137 |
.5458 |
.45 |
.5847 |
.2924 |
.3216 |
.3508 |
.3801 |
.4093 |
.4385 |
.4678 |
.4970 |
.40 |
.5197 |
.2599 |
.2858 |
.3118 |
.3378 |
.3638 |
.3898 |
.4158 |
.4417 |
.35 |
.4547 |
.2274 |
.2501 |
.2728 |
.2956 |
.3183 |
.3410 |
.3638 |
.3865 |
.30 |
.3896 |
.1948 |
.2143 |
.2338 |
.2532 |
.2727 |
.2922 |
.3117 |
.3312 |
.25 |
.3246 |
.1663 |
.1785 |
.1948 |
.2110 |
.2272 |
.2434 |
.2597 |
.2759 |


