M – Metric Thread (ISO)

Figure 1: Demonstration of ISO Metric thread standard. The flank angle is 60°, and both male and female threads are parallel.
The ISO Metric Thread is one of the first internationally approved general-purpose thread types. ISO 68-1 defines the design principles of metric screw threads. ISO metric threads consist of symmetric v-shaped threads. The v-shaped thread form has a 60° flank angle, and male and female threads are both parallel (Figure 1).
Click the button below to download the following Metric Thread tables
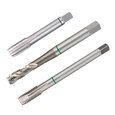
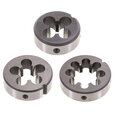
Explore Tameson's selection of thread cutting tools
Metric standard
Metric fasteners are specified with a thread pitch instead of a thread count. The thread pitch is the distance between threads and is expressed in millimeters. Smaller fasteners generally have finer threads and a lower thread pitch.
Metric threads come in different pitch sizes for a given diameter: coarse and fine pitches.
- Coarse pitch: Coarse threads have a default pitch size, and they are identified by only their diameter. These threads have a default pitch size according to metric thread dimensions in Table 1 and are the most commonly used thread types. They adhere to ISO 724 (DIN 13-1).
- Fine pitch: Fine threads have a smaller pitch size, and they are used less often. They are recognized by their diameter and pitch size. They adhere to ISO 724 (DIN 13-2 to 11).
Table 1: ISO metric thread size chart (Coarse)
| Thread size (mm) | Major diameter (mm) | Minor diameter (mm) | Pitch (mm) |
| M 3 | 2.98 | 2.459 | 0.5 |
| M 4 | 3.978 | 3.242 | 0.7 |
| M 5 | 4.976 | 4.134 | 0.8 |
| M 6 | 5.976 | 4.917 | 1 |
| M 8 | 7.974 | 6.917 | 1.25 |
| M 10 | 9.968 | 8.376 | 1.5 |
| M 12 | 11.97 | 10.106 | 1.75 |
| M 16 | 15.96 | 13.835 | 2 |
| M 20 | 19.96 | 17.294 | 2.5 |
| M 24 | 23.95 | 20.752 | 3 |
Table 2: ISO metric thread size chart (Fine)
|
Size - Nominal Diameter (mm) |
Pitch (mm) |
Tap drill (mm) |
| M 1.0 x 0.2 | 0.20 | 0.80 |
| M 1.1 x 0.2 | 0.20 | 0.90 |
| M 1.2 x 0.2 | 0.20 | 1.00 |
| M 1.4 x 0.2 | 0.20 | 1.20 |
| M 1.6 x 0.2 | 0.20 | 1.40 |
| M 1.8 x 0.2 | 0.20 | 1.60 |
| M 2 x 0.25 | 0.25 | 1.75 |
| M 2.2 x 0.25 | 0.25 | 1.95 |
| M 2.5 x 0.35 | 0.35 | 2.10 |
| M 3 x 0.35 | 0.35 | 2.60 |
| M 3.5 x 0.35 | 0.35 | 3.10 |
| M 4 x 0.5 | 0.50 | 3.50 |
| M 4.5 x 0.5 | 0.50 | 4.00 |
| M 5 x 0.5 | 0.50 | 4.50 |
| M 5.5 x 0.5 | 0.50 | 5.00 |
| M 6 x 0.75 | 0.75 | 5.20 |
| M 7 x 0.75 | 0.75 | 6.20 |
| M 8 x 0.75 | 0.75 | 7.20 |
| M 8 x 1.0 | 1.00 | 7.00 |
| M 9 x 0.75 | 0.75 | 8.20 |
| M 9 x 1 | 1.00 | 8.00 |
| M 10 x 0.75 | 0.75 | 9.20 |
| M 10 x 1 | 1.00 | 9.00 |
| M 10 x 1.25 | 1.25 | 8.80 |
| M 11 x 0.75 | 0.75 | 10.20 |
| M 11 x 1 | 1.00 | 10.00 |
| M 12 x 1 | 1.00 | 11.00 |
| M 12 x 1.25 | 1.25 | 10.80 |
| M 12 x 1.5 | 1.50 | 10.50 |
| M 14 x 1.0 | 1.00 | 13.00 |
| M 14 x 1.25 | 1.25 | 12.80 |
| M 14 x 1.5 | 1.50 | 12.50 |
Note: ISO 724 standard specifies threads up to M 300; hence Tables 1-2 shows only the most common thread sizes in use.
Labeling examples
- M4 x 0.5: This indicates a fine thread with a diameter of 4 mm and a pitch size of 0.5 mm
- M8: This refers to a metric coarse thread with a diameter of 8 mm (which, with reference to Table 1, corresponds to a pitch size of 1 mm)
Read our article on thread tolerance for more information on how to add a thread tolerance value to the metric labeling system. Also, read our NPT, BSP, and Unified thread standard articles for more information on other thread standards.
FAQs
What is the ISO metric thread standard?
ISO metric threads consist of symmetric v-shaped threads. The v-shaped thread form has a 60° flank angle, and male and female threads are both parallel.
What is M6 in standard?
M6 refers to a metric 6 mm screw. The screw has an outer diameter of 6 mm.


