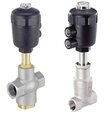
A Guide to Troubleshooting Pneumatic Control Valve Issues
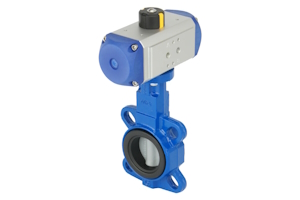
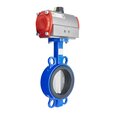
Figure 1: A pneumatic butterfly valve
Pneumatic control valves manage the flow of air or gas to control different processes. When pneumatic actuator valve issues occur, they can cause performance issues, safety concerns, and reduced efficiency. This guide helps to identify and fix common issues with pneumatic control valves, keeping operations running smoothly and effectively.
Table of contents
- Types of pneumatic control valves
- Understanding pneumatic control valves
- Common faults in pneumatic control valves
- Faulty pneumatic control valve symptoms
- Troubleshooting steps
- FAQs
View our online selection of pneumatic valves!
Types of pneumatic control valves
This article uses a pneumatic globe valve as an example of a pneumatic control valve. Other types of pneumatic control valves are:
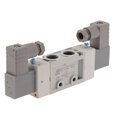
- Directional control valves
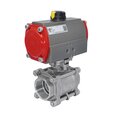
- Pneumatic ball valves
- Pneumatic butterfly valves
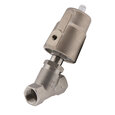
- Pneumatic angle seat valves
- Pinch valves
Understanding pneumatic control valves
Pneumatic control valves operate using compressed air to control the flow of liquids or gasses. Pneumatic control valves have important parts such as the actuator, valve body, and positioner.
They also include the valve stem, seat, plug, and seals or gaskets. Understanding these components is essential for diagnosing and troubleshooting issues effectively. As an example, Figure 2 illustrates the following components of a pneumatic globe valve:
- Actuator (A): The actuator changes air pressure into mechanical motion. It can be a diaphragm or piston type. The actuator moves the valve stem to adjust the valve position and control flow. Single-acting actuators use air pressure to move in one direction. Double-acting actuators use air pressure to move in both directions.
- Spring (B): Some actuators use a spring to return the valve to a fail-safe position when they lose air pressure. This ensures that the valve defaults to a safe state in case of system failure.
- Yoke (C): The yoke is a structural component that supports the actuator and connects it to the valve body. It ensures proper alignment and stability of the actuator and valve assembly.
- Positioner (D): The positioner gets control signals and moves the actuator to set the valve in the right position. It sends feedback to the control system for accurate operation. Positioners can be pneumatic, electro-pneumatic, or digital, each offering different levels of control accuracy and communication.
- Bonnet (E): The bonnet is the part of the valve that covers the stem and internal components. It provides a pressure-tight seal and can be removed for maintenance.
- Valve body (F): The valve body holds parts that control flow, like the valve seat and plug. The valve body's design affects how much and how well it can control flow. Common valve body types are globe, ball, butterfly, and gate valves. Each type is good for different uses and flow needs.
- Valve stem (G): The valve stem links the actuator to parts inside the valve, like the plug. It moves the plug to control the flow.
- Seals and gaskets (H): Seals and gaskets stop leaks in the valve assembly. They keep compressed air and controlled fluid or gas from escaping, ensuring the system stays efficient and safe.
- Valve seat and plug (I): The valve seat and plug are important for controlling flow. The plug moves in and out of the seat to open or close the valve. The design and material of the seat and plug impact how well the valve seals and how long it lasts.
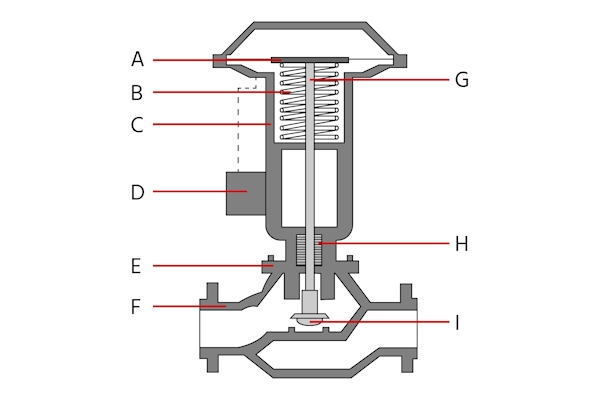
Figure 2: A pneumatic globe valve with components: actuator/diaphragm (A), spring (B), yoke (C), positioner (D), bonnet (E), body (F), stem (G), seals and gaskets (H), and valve seat and plug (I).
Common faults in pneumatic control valves
Pneumatic control valves can experience several common faults that affect their performance. Identifying these issues early can prevent downtime and maintain system efficiency. Some common faults include:
- Air leaks: Air leaks in the supply line or valve can weaken the actuator, causing the valve to work incorrectly.
- Sticking or jamming: Debris or rust can make the valve stem or internal parts stick or jam, stopping smooth operation.
- Actuator failure: Actuators can fail due to wear and tear, loss of air pressure, or mechanical damage, resulting in the valve not responding to control signals.
- Positioner malfunction: A faulty positioner can lead to incorrect valve positioning, causing flow control issues.
- Seal wear: Worn or damaged seals can cause leaks and reduce the valve's ability to maintain pressure.
Faulty pneumatic control valve symptoms
There are several symptoms that indicate a faulty pneumatic control valve. Table 1 provides an overview of the symptoms, their potential causes, and offers solutions that may solve the problem.
Table 1: Faulty pneumatic control valve symptoms, causes, and possible solutions
| Symptom | Potential causes | Solution |
|---|---|---|
Valve not operating |
Inadequate air supply or pressure | Use a pressure gauge to check air supply. Make sure it matches the actuator's needs. Check the compressor and air supply lines to ensure everything works properly. |
| Leaks or blockages in air lines | Use soapy water to detect leaks; inspect and clean air filters; replace damaged air lines | |
| Actuator not functioning correctly (wear, damage, or air leaks) | Perform a visual inspection for wear or damage; use a leak detection spray; replace worn seals or diaphragms | |
| Positioner not receiving/responding to control signals | Check electrical connections and wiring; use a multimeter to verify signal integrity; recalibrate or replace the positioner if necessary | |
| Sticking, corrosion, or debris in valve stem and internal components | Disassemble the valve; clean components with appropriate solvents; use anti-corrosion treatments; replace damaged parts | |
| Faulty control signals | Use an oscilloscope to check if the signal is good. Make sure control cables are properly grounded and shielded. Update or fix control system software if needed. | |
Unstable valve action |
Fluctuations in air supply pressure | Install a pressure regulator and air filter. Check for issues with the compressor cycling. Use an air receiver tank to make the air supply more stable. |
| Incorrectly calibrated positioner | Follow manufacturer’s calibration procedure; use calibration tools like a HART communicator; verify calibration with a test signal | |
| Malfunctioning actuator (wear or damage) | Inspect actuator internals; replace worn or damaged parts; perform a bench test to verify actuator performance | |
| Inconsistent control signals (noise or interference) | Use shielded cables; install noise filters; check for electromagnetic interference (EMI) sources and mitigate them | |
| Incorrect valve sizing for the application | Re-evaluate process requirements; consult with valve manufacturer for proper sizing; replace with correctly sized valve if necessary | |
Slow valve action |
Insufficient air supply pressure or flow | Check air supply capacity; ensure air lines are not undersized; inspect for restrictions or leaks in air supply system |
| Faulty actuator (wear, damage, or internal leaks) | Perform a pressure decay test; inspect for internal leaks; replace worn seals or diaphragms | |
| Excessive friction in valve stem or internal components | Disassemble and inspect for wear; apply appropriate lubrication; replace worn components | |
| Incorrect positioner settings | Use manufacturer’s manual to verify settings; recalibrate positioner; perform a dynamic response test to ensure proper operation | |
| Delays in control system signals | Check for network delays in digital control systems. Make sure control system software is current. Optimize the settings in control loops for better performance. | |
Large leakage when fully closed |
Worn or damaged seals | Inspect seals for wear or damage; use manufacturer-recommended seal materials; replace seals and verify proper installation |
| Damaged valve seat (wear, corrosion, or damage) | Inspect valve seat with a borescope; use lapping tools to repair minor damage; replace valve seat if severely damaged | |
| Improper valve alignment | Use alignment tools to verify and adjust valve alignment; ensure actuator and valve are properly coupled | |
| Debris or contaminants preventing proper sealing | Flush the valve and pipeline; install strainers or filters upstream; clean valve internals thoroughly | |
| Underperforming actuator not closing valve tightly | Check actuator torque or thrust output; ensure air supply is adequate; replace or upgrade actuator if necessary | |
Inability of the valve to close completely |
Insufficient actuator force | Verify actuator sizing; check air supply pressure; consider using a booster relay to increase actuator force |
| Obstructions or debris in valve stem | Disassemble valve; clean and inspect stem; remove any obstructions or debris | |
| Improperly calibrated positioner | Follow detailed calibration procedure; use calibration equipment to verify accuracy; adjust settings as needed | |
| Mechanical wear or damage in valve components (stem, seat, or plug) | Inspect components for wear or damage; use precision measuring tools to check tolerances; replace worn or damaged parts | |
| Faulty control signals | Use diagnostic tools to check signal integrity; ensure proper configuration of control system; repair or replace faulty components | |
Leakage in packing and valve body seals |
Worn packing material around valve stem | Inspect packing for wear; use manufacturer-recommended packing material; replace packing and ensure proper installation |
| Incorrect packing installation | Follow manufacturer’s installation guidelines; use proper tools to install packing; ensure even compression of packing material | |
| Loose packing gland | Use a torque wrench to tighten packing gland to specified torque; check for even compression | |
| Worn, damaged, or improperly seated valve body seals | Inspect seals for wear or damage; use proper seating tools; replace seals and ensure correct seating | |
| Corrosion or physical damage to valve body and stem | Inspect for corrosion or damage; use corrosion-resistant materials; repair or replace damaged parts | |
| Operating beyond specified pressure and temperature limits | Verify operating conditions; ensure valve is rated for current pressure and temperature; replace with appropriately rated valve if necessary |
Troubleshooting steps
If there is a problem and the cause is unknown, the following troubleshooting steps should be followed to identify the source of the fault.
- Review maintenance records: The maintenance history of the valve should be checked to find any recurring issues or patterns that might explain the current problem.
- Visual inspection: Begin with a thorough visual inspection of the valve and its components. Look for obvious signs of wear, damage, or leaks.
- Check air supply: Use a pressure gauge to ensure the air supply is adequate and within the specified pressure range. Inspect air lines for leaks, blockages, or pressure fluctuations.
- Inspect actuator: Verify that the actuator is functioning correctly. Check for air leaks, mechanical damage, or signs of wear. Ensure that the actuator is receiving the correct air pressure.
- Examine positioner: Ensure the positioner is calibrated correctly and functioning. Check for electrical or pneumatic issues that could affect its performance. Read the manufacturer's guidelines for guidance on how to calibrate the pneumatic control valve.
- Evaluate control signals: Verify that the control signals being sent to the valve are accurate and consistent. Check for any electrical or signal interference.
- Test valve operation: Manually operate the valve to check for smooth movement. Listen for any unusual noises that could indicate internal issues.
- Inspect internal components: If necessary, disassemble the valve to inspect internal components such as the valve seat, stem, and seals. Look for signs of wear, corrosion, or debris.
- Check for obstructions: Ensure that there are no obstructions in the valve or the pipeline that could impede valve operation.
FAQs
What causes pneumatic actuator valve issues?
Pneumatic actuator valve issues can be caused by air leaks, blockages, misalignment, or faulty components.
How do you troubleshoot a pneumatic actuator valve?
To troubleshoot a pneumatic actuator valve, check for air leaks, ensure proper alignment, inspect for blockages, and test the actuator's response.
What are common signs of pneumatic actuator valve failure?
Common signs of pneumatic actuator valve failure include erratic movement, slow response, air leaks, and unusual noises.
How can you prevent pneumatic actuator valve issues?
Prevent pneumatic actuator valve issues by regular maintenance, checking for leaks, ensuring proper alignment, and replacing worn parts.


